
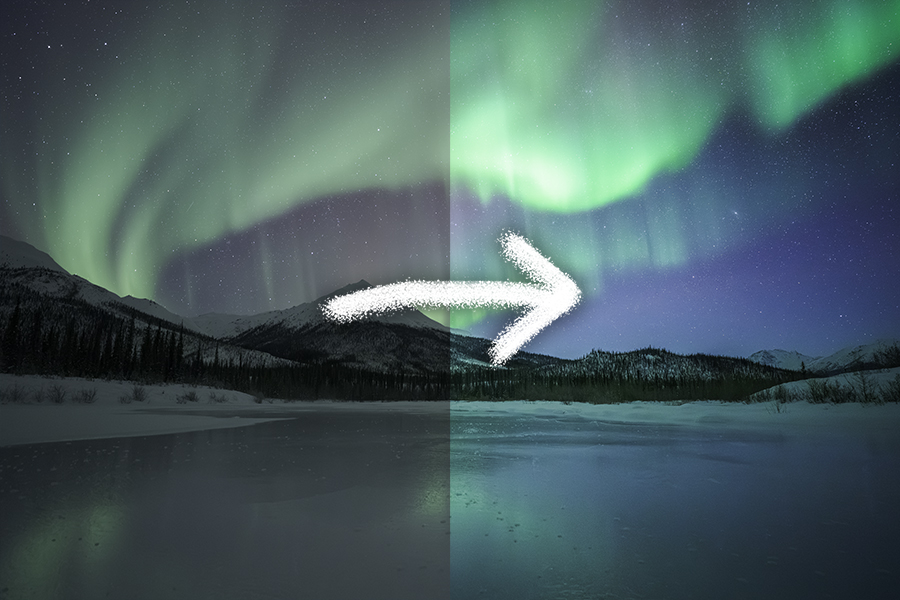
After more than a decade of photographing the aurora, I’ve developed an editing workflow that consistently produces clean, natural-looking results while preserving the magic of the night. In this guide, I’ll walk you through a basic complete process, from correcting white balance and reducing noise to enhancing the aurora without making it look artificial.
Original Raw Image
This image was taken at 14mm, ISO 6400, with a 10 second shutter speed. Notice how it’s underexposed and overly green.

Changing Picture Profile
A great way to start off your aurora image edits is to change the picture profile. This works as a starting point for how the RAW data is displayed. Neutral gives a very low saturation, low contrast starting point. This is great for photos taken during the night which are usually quite dark.

Correcting White Balance
No matter what settings you have in your camera, the white balance for aurora photos will ALWAYS need to be corrected.
A trick I use to correct white balance is to increase the saturation to +100, and then adjust the white balance and tint until there’s no one dominant color. Afterwards you can reduce the saturation to a normal amount.

Basic Tonal Edits

Curves
I generally like to use curves to add contrast, rather than the direct contrast slider. This allows a bit more flexibility in where the contrast is applied. In this image, I wanted to make the histogram centered for a more balanced image.

AI Denoise
Because aurora photos are taken at a high ISO, you’ll often have quite a bit of noise or grain to the image. In this case, our photo was taken at ISO 6400. For this edit, I’m sticking with Lightroom and it’s AI denoise. You can also use programs like Topaz Labs.
Something to remember is that AI Denoise resets the color noise reduction. Bring this slider back up to +10 to get rid of a weird rainbow like effect.


Basic Masking
The last step is to apply any local adjustments via the masking panel. This image has just a few masks to create a vignette, brighten the center, and adjust the contrast and colors of the aurora itself. In the mask targeting the aurora, I’ve added a lot of clarity which helps bring out the vertical banding or curtain look seen in the aurora.
If you’d like to know more advanced masking techniques, check out this YouTube video which goes in depth on the how and why.

Final Image
Below is the final, edited photograph. There’s few things I love more than photographing and seeing the aurora, and images like this are one of the reasons why.
If you’d like to capture scenes like this for yourself, consider joining me on one of my Alaska tours.

Leave a Reply